Building ChatGPT plugins
Use Supabase as a Retrieval Store for your ChatGPT plugin.
ChatGPT recently released Plugins which help ChatGPT access up-to-date information, run computations, or use third-party services. If you're building a plugin for ChatGPT, you'll probably want to answer questions from a specific source. We can solve this with “retrieval plugins”, which allow ChatGPT to access information from a database.
What is ChatGPT Retrieval Plugin?
A Retrieval Plugin is a Python project designed to inject external data into a ChatGPT conversation. It does a few things:
- Turn documents into smaller chunks.
- Converts chunks into embeddings using OpenAI's
text-embedding-ada-002model. - Stores the embeddings into a vector database.
- Queries the vector database for relevant documents when a question is asked.
It allows ChatGPT to dynamically pull relevant information into conversations from your data sources. This could be PDF documents, Confluence, or Notion knowledge bases.
Example: Chat with Postgres docs
Let’s build an example where we can “ask ChatGPT questions” about the Postgres documentation. Although ChatGPT already knows about the Postgres documentation because it is publicly available, this is a simple example which demonstrates how to work with PDF files.
This plugin requires several steps:
- Download all the Postgres docs as a PDF
- Convert the docs into chunks of embedded text and store them in Supabase
- Run our plugin locally so that we can ask questions about the Postgres docs.
We'll be saving the Postgres documentation in Postgres, and ChatGPT will be retrieving the documentation whenever a user asks a question:
Step 1: Fork the ChatGPT Retrieval Plugin repository
Fork the ChatGPT Retrieval Plugin repository to your GitHub account and clone it to your local machine. Read through the README.md file to understand the project structure.
Step 2: Install dependencies
Choose your desired datastore provider and remove unused dependencies from pyproject.toml. For this example, we'll use Supabase. And install dependencies with Poetry:
1poetry installStep 3: Create a Supabase project
Create a Supabase project and database by following the instructions here. Export the environment variables required for the retrieval plugin to work:
1234export OPENAI_API_KEY=<open_ai_api_key>export DATASTORE=supabaseexport SUPABASE_URL=<supabase_url>export SUPABASE_SERVICE_ROLE_KEY=<supabase_key>For Postgres datastore, you'll need to export these environment variables instead:
1234export OPENAI_API_KEY=<open_ai_api_key>export DATASTORE=postgresexport PG_HOST=<postgres_host_url>export PG_PASSWORD=<postgres_password>Step 4: Run Postgres locally
To start quicker you may use Supabase CLI to spin everything up locally as it already includes pgvector from the start. Install supabase-cli, go to the examples/providers folder in the repo and run:
1supabase startThis will pull all docker images and run Supabase stack in docker on your local machine. It will also apply all the necessary migrations to set the whole thing up. You can then use your local setup the same way, just export the environment variables and follow to the next steps.
Using supabase-cli is not required and you can use any other docker image or hosted version of Postgres that includes pgvector. Just make sure you run migrations from examples/providers/supabase/migrations/20230414142107_init_pg_vector.sql.
Step 5: Obtain OpenAI API key
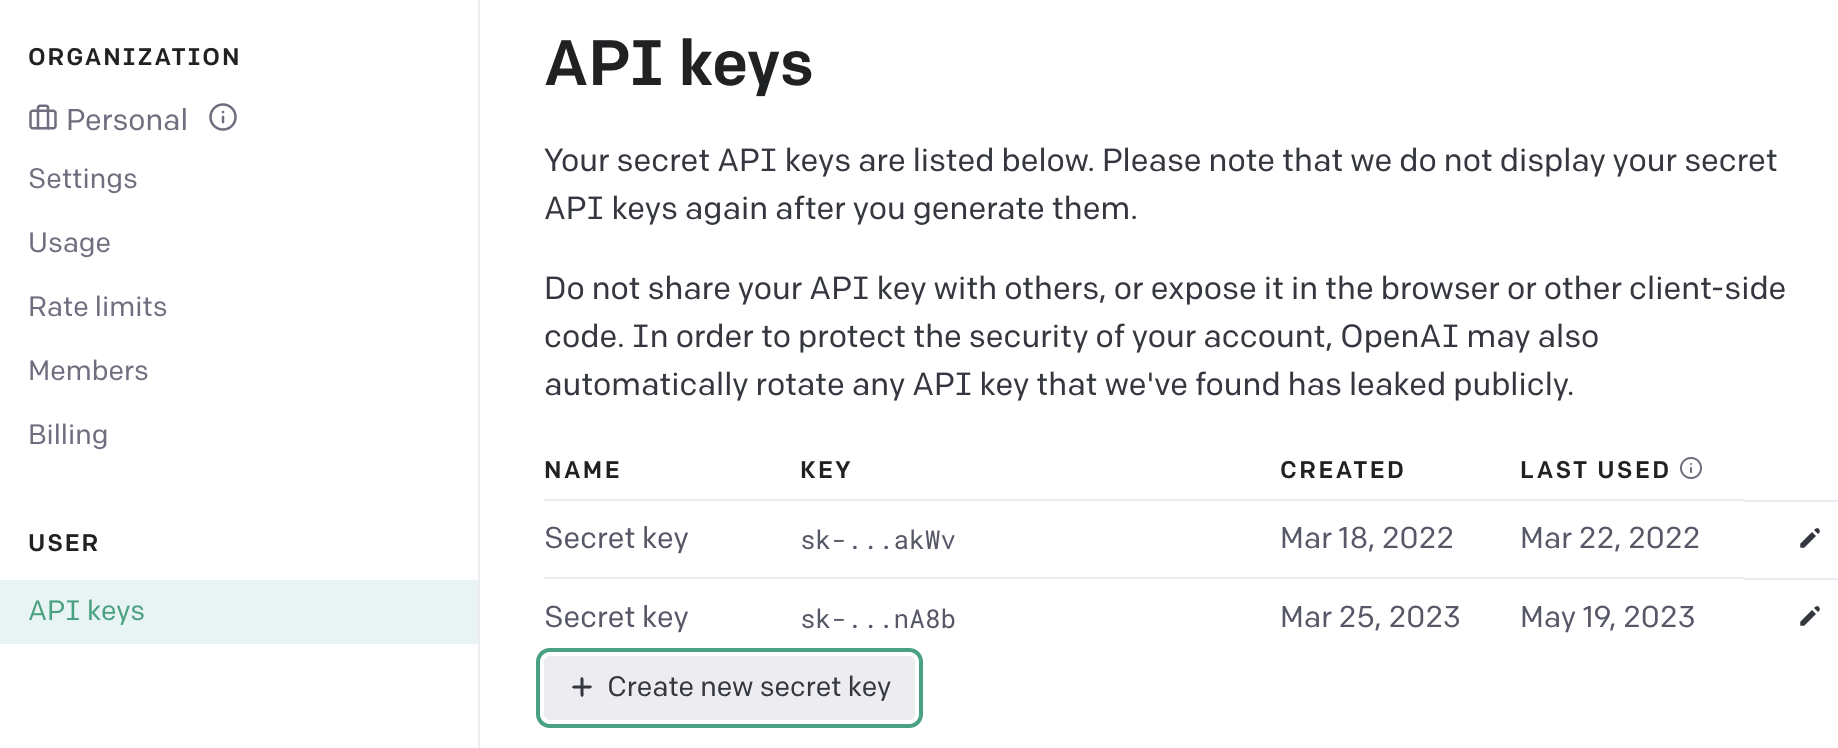
To create embeddings Plugin uses OpenAI API and text-embedding-ada-002 model. Each time we add some data to our datastore, or try to query relevant information from it, embedding will be created either for inserted data chunk, or for the query itself. To make it work we need to export OPENAI_API_KEY. If you already have an account in OpenAI, you just need to go to User Settings - API keys and Create new secret key.
Step 6: Run the plugin
Execute the following command to run the plugin:
12345678poetry run dev# outputINFO: Will watch for changes in these directories: ['./chatgpt-retrieval-plugin']INFO: Uvicorn running on http://localhost:3333 (Press CTRL+C to quit)INFO: Started reloader process [87843] using WatchFilesINFO: Started server process [87849]INFO: Waiting for application startup.INFO: Application startup complete.The plugin will start on your localhost - port :3333 by default.
Step 6: Populating data in the datastore
For this example, we'll upload Postgres documentation to the datastore. Download the Postgres documentation and use the /upsert-file endpoint to upload it:
1curl -X POST -F \\"file=@./postgresql-15-US.pdf\\" <http://localhost:3333/upsert-file>The plugin will split your data and documents into smaller chunks automatically. You can view the chunks using the Supabase dashboard or any other SQL client you prefer. The entire Postgres Documentation yielded 7,904 records, which is not a lot, but we can try to add index for embedding column to speed things up by a little. To do so, you should run the following SQL command:
123create index on documentsusing hnsw (embedding vector_ip_ops)with (lists = 10);This will create an index for the inner product distance function. Important to note that it is an approximate index. It will change the logic from performing the exact nearest neighbor search to the approximate nearest neighbor search.
We are using lists = 10, because as a general guideline, you should start looking for optimal lists constant value with the formula: rows / 1000 when you have less than 1 million records in your table.
Step 7: Using our plugin within ChatGPT
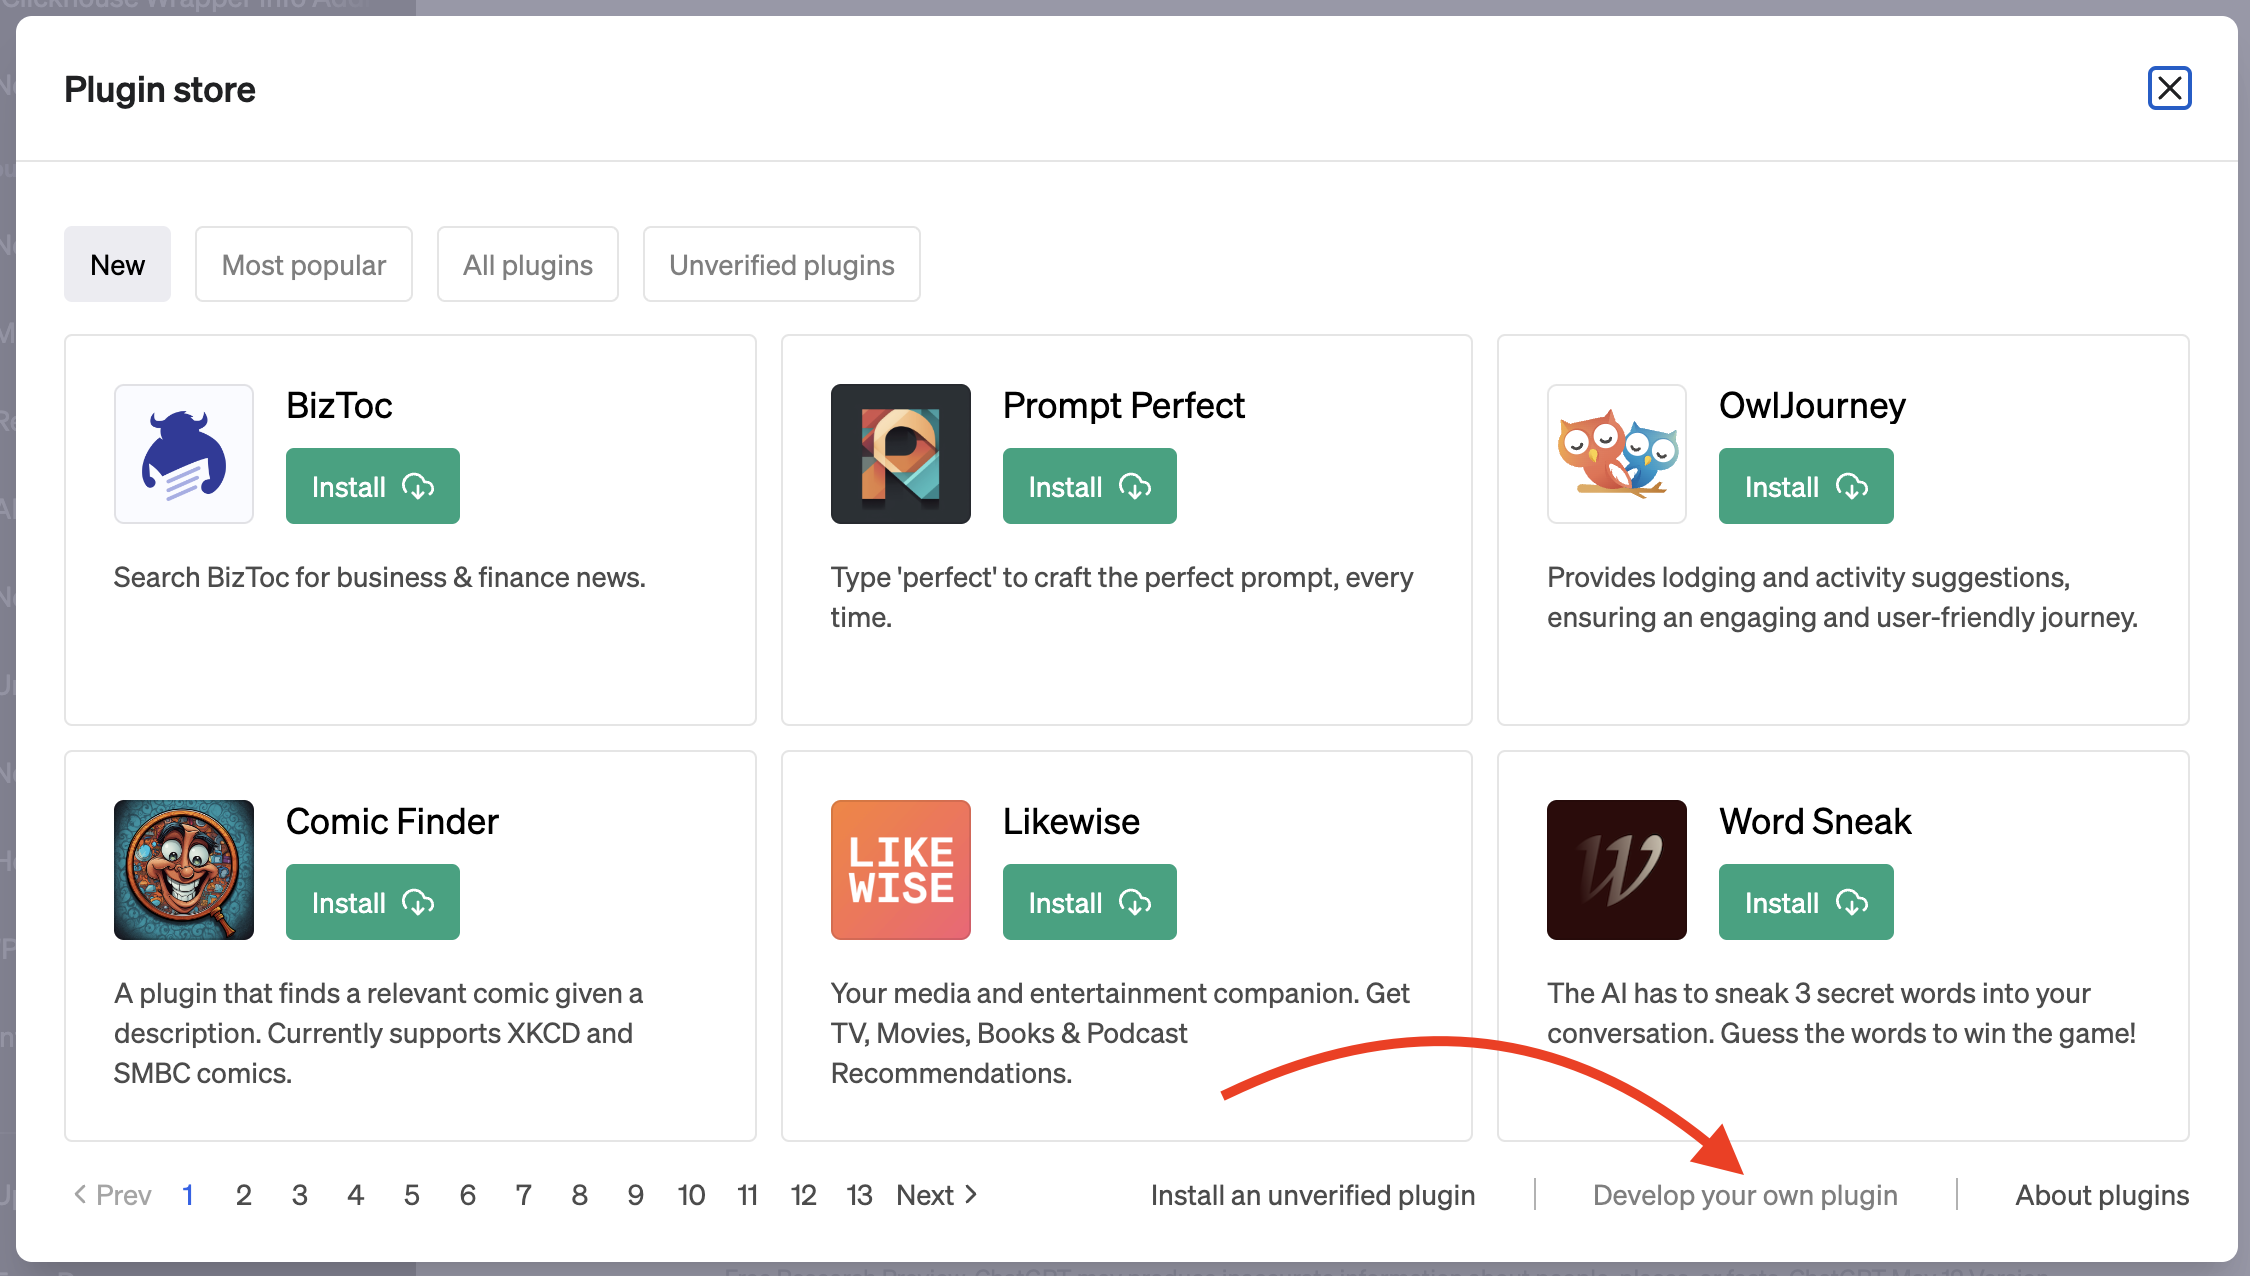
To integrate our plugin with ChatGPT, register it in the ChatGPT dashboard. Assuming you have access to ChatGPT Plugins and plugin development, select the Plugins model in a new chat, then choose "Plugin store" and "Develop your own plugin." Enter localhost:3333 into the domain input, and your plugin is now part of ChatGPT.
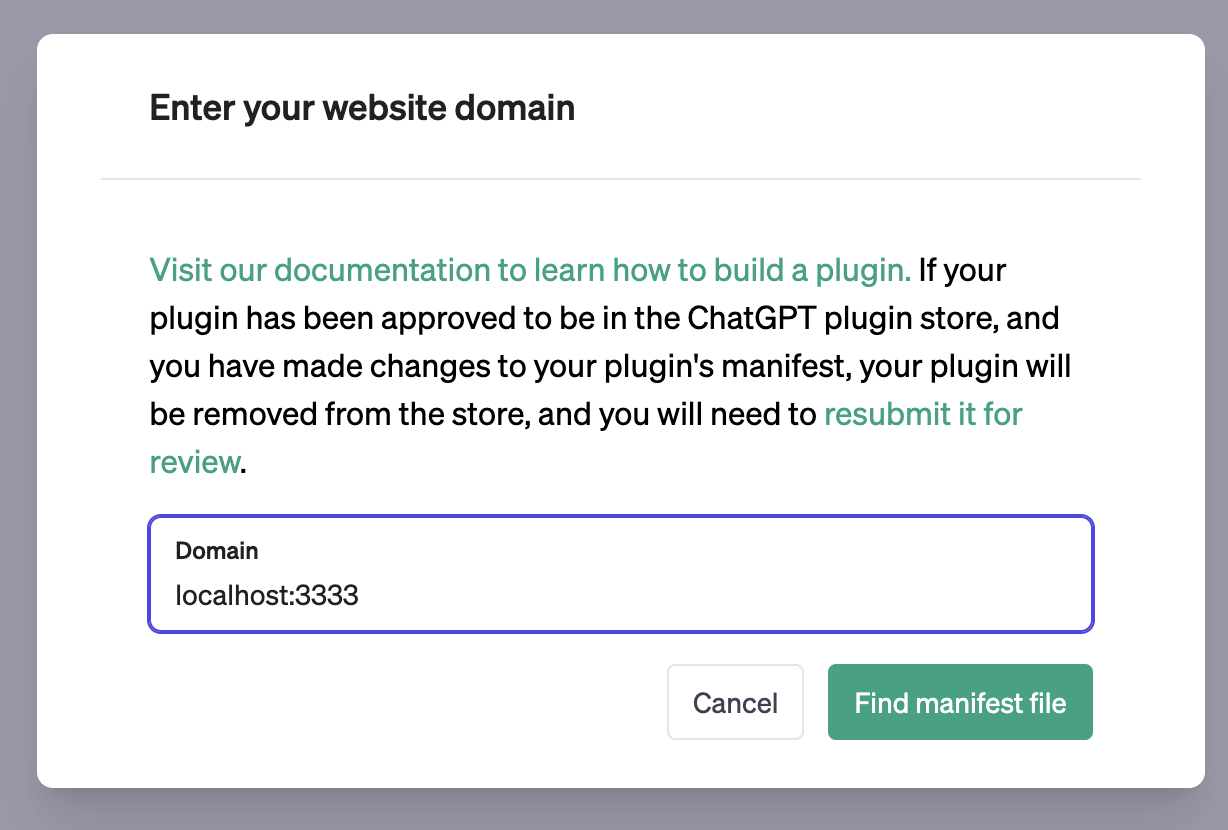
You can now ask questions about Postgres and receive answers derived from the documentation.
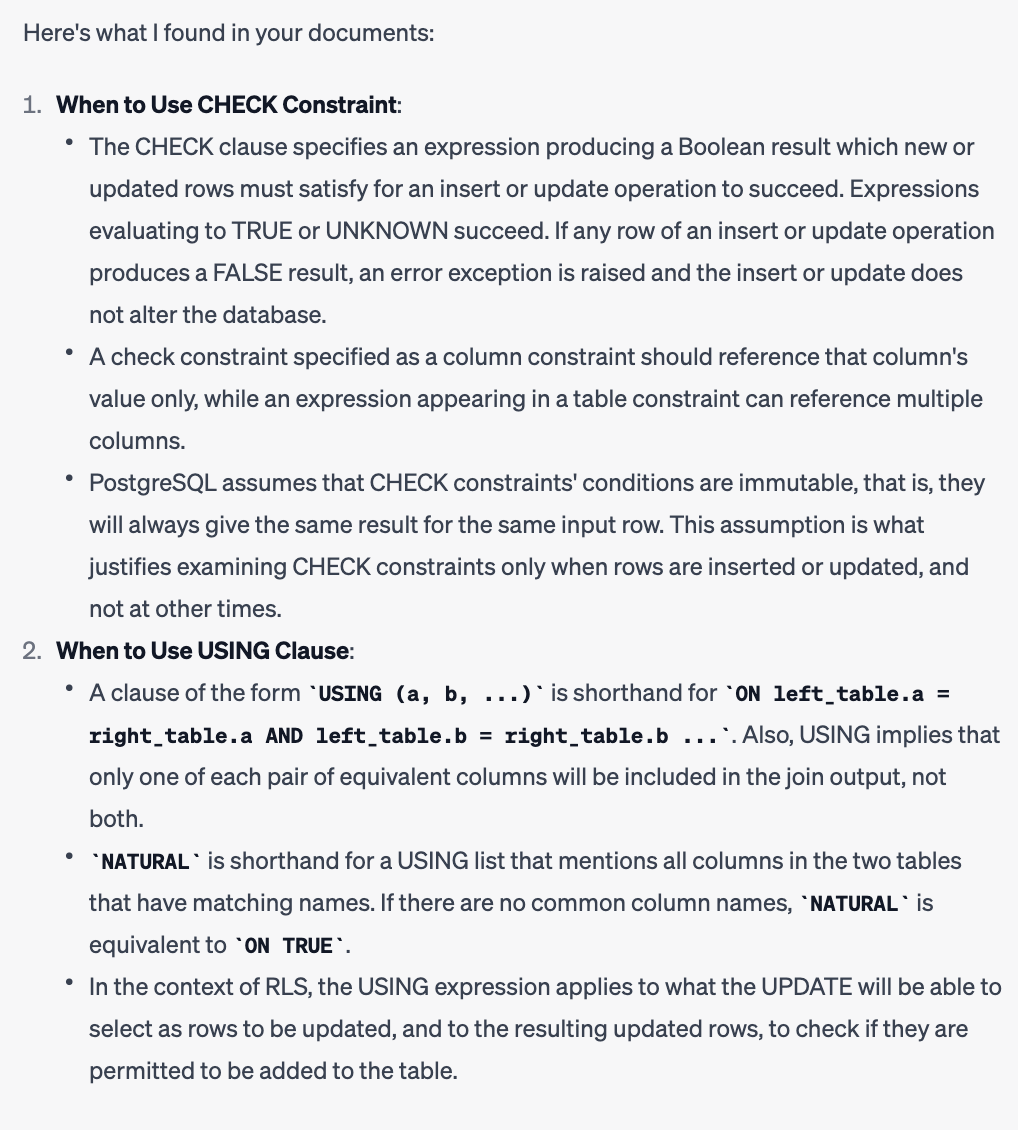
Let's try it out: ask ChatGPT to find out when to use check and when to use using. You will be able to see what queries were sent to our plugin and what it responded to.
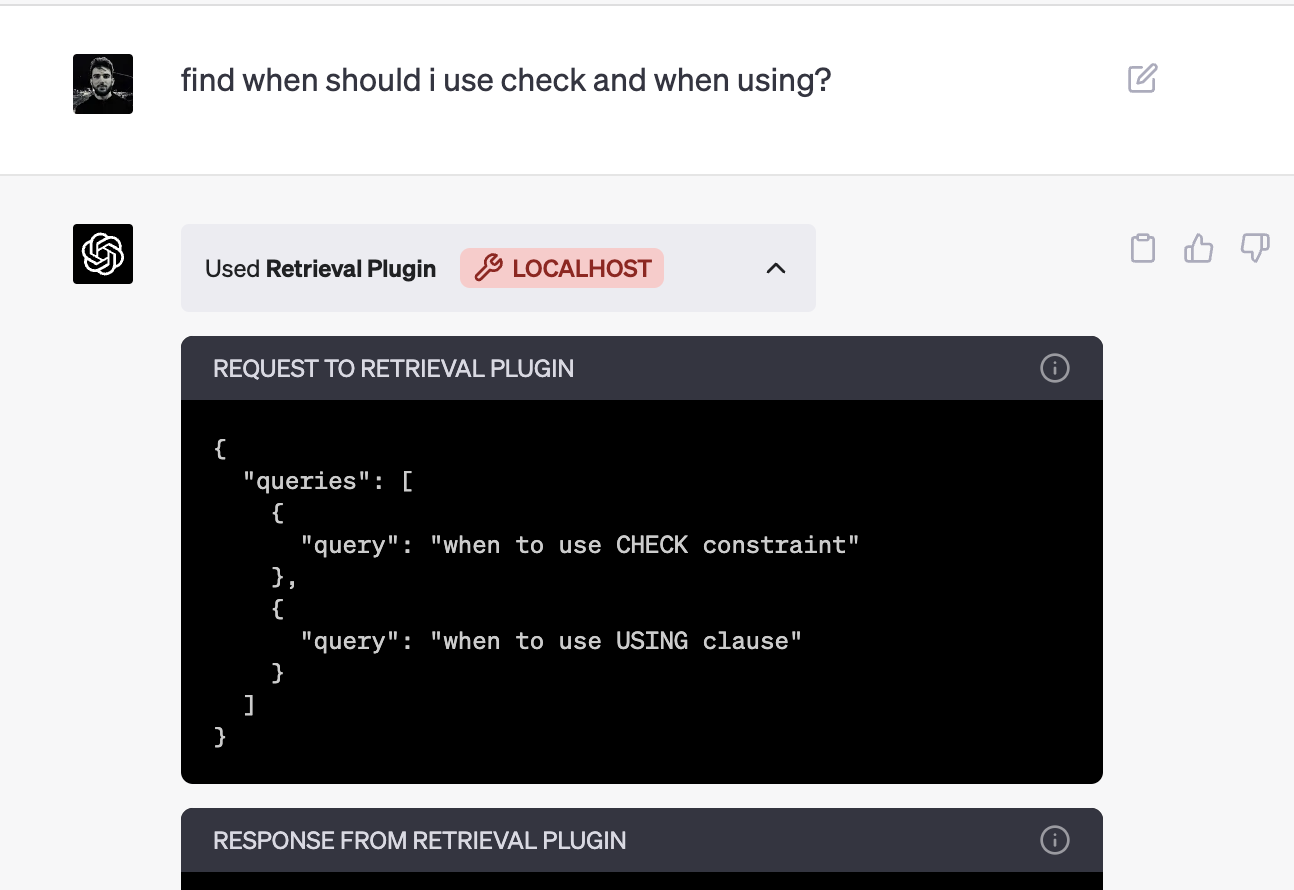
And after ChatGPT receives a response from the plugin it will answer your question with the data from the documentation.
Resources
- ChatGPT Retrieval Plugin: github.com/openai/chatgpt-retrieval-plugin
- ChatGPT Plugins: official documentation